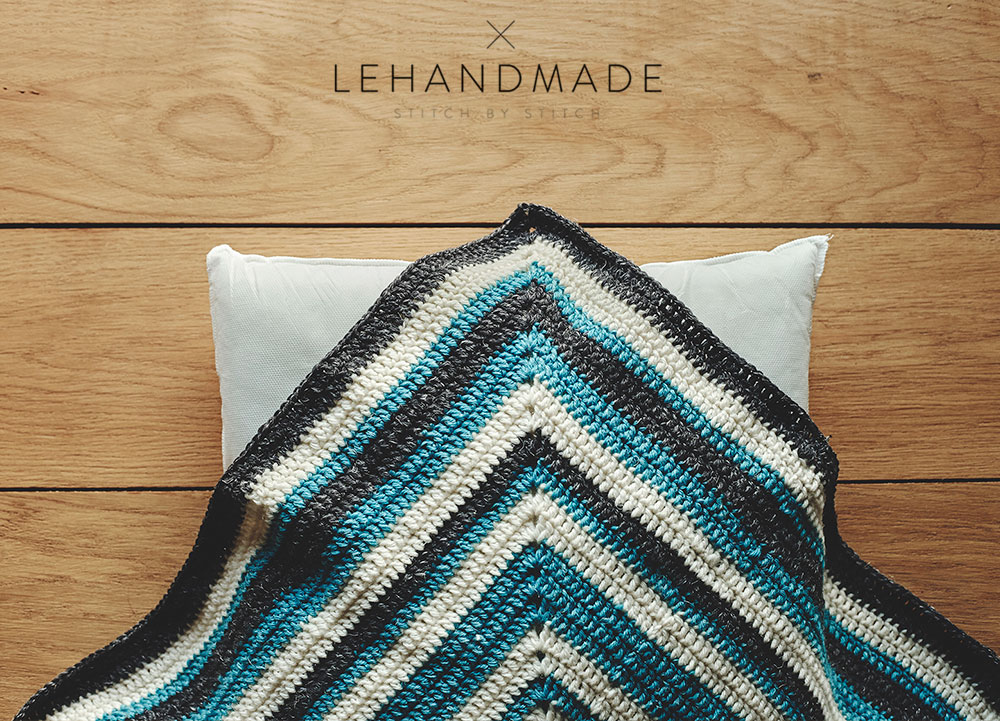
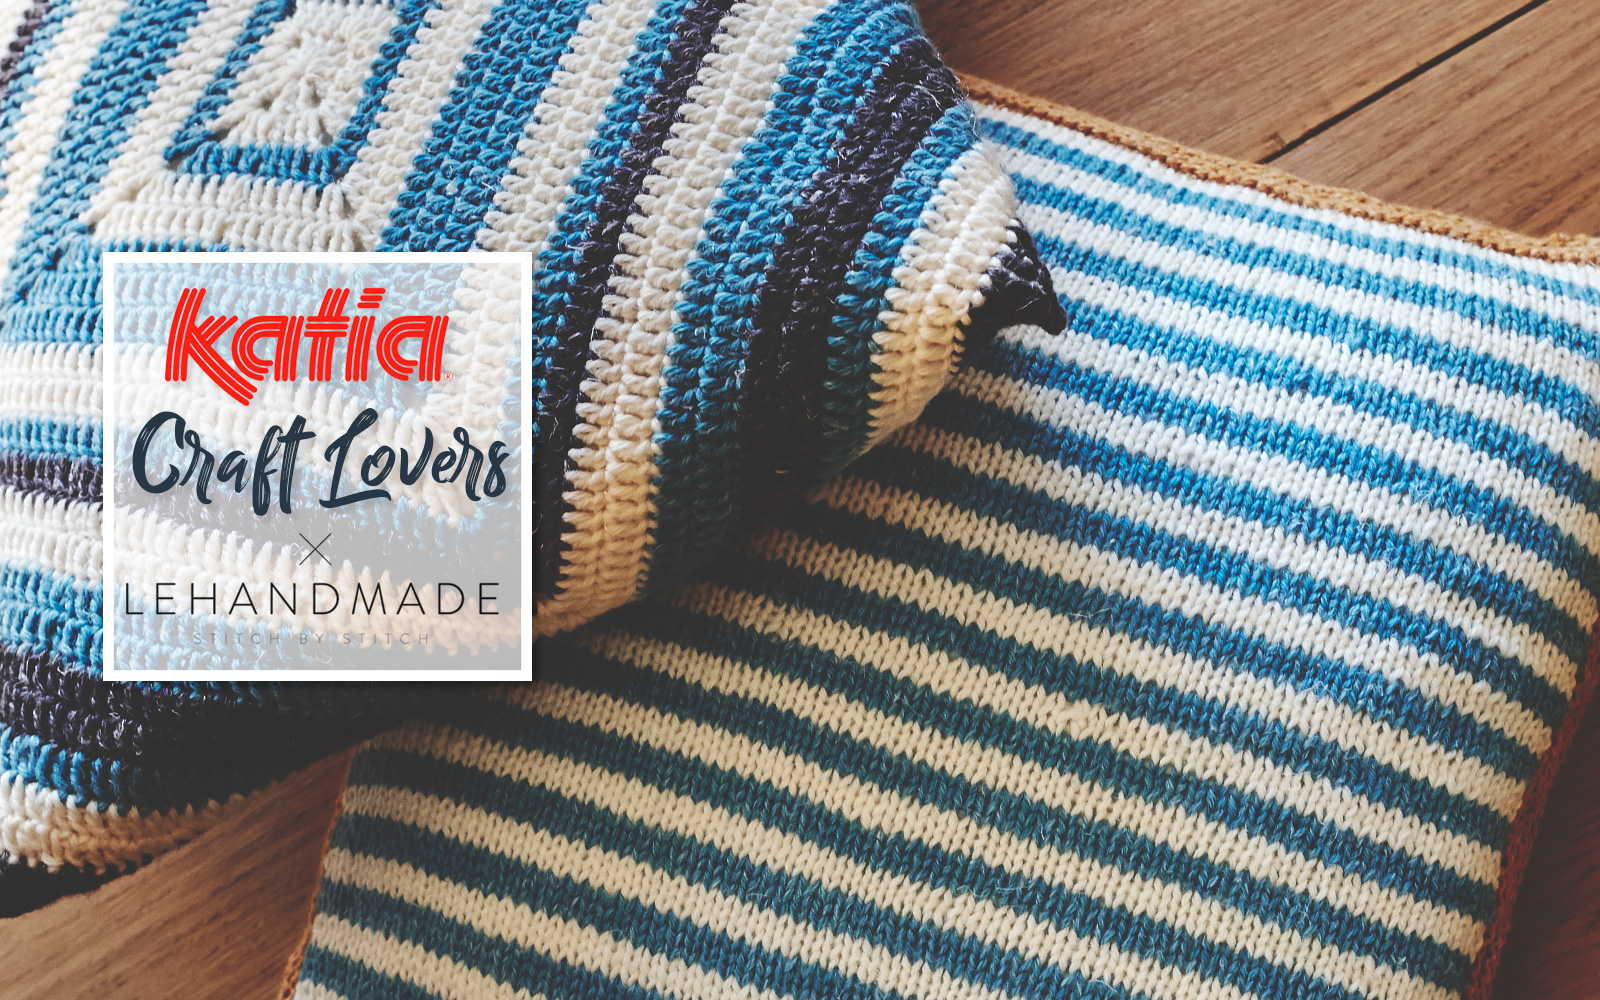
That 70´s Show knit and crochet cushions designed by Lehandmade using Katia Merino-Lino
Welcome to our new Craft Lovers! On this occasion, the protagonist of our favourite section is Emilie from Lehandmade. This french self taught knitter and crocheter -located in Madrid- is sharing a very televisual project: That 70´s Show Cushions. Emelie´s hands and head have created two cushion covers which we are sure are going to touch your heart. As the project name indicates, the cushions have been inspired by the That 70´s Show television series. Whether you know this series or not, the patterns for these knit and crochet cushion covers will have you hooked all the same. Of course, count on the special performance of Katia Merino-Lino and the colourways chosen by Lehandmade. On one hand, there´s a striped knit cover with a mustard border that highlights the turquoise and cream stripes. And on the other, a fun cushion cover made out of one large granny square.
That 70´s Show Cushions
You´ll find the patterns for The Striped 70´s Show knit cushion cover and the The Square 70´s Show crochet cushion cover to follow. We´d like to encourage you to knit or crochet the That 70´s Show cushions, for example, whilst you watch the series that inspired their design. Is there anything better than combining hobbies together? There´s no doubt that the That 70´s Show cushions are an example of how uniting passions gives great results. For Lehandmade, knit and crochet “are two activities that mean I never stop learning, both about myself and new techniques”. This pair of cushions are an example of the infinite creativity that Emilie brings together on Instagram and Facebook. Follow her!

The Striped 70´s Show knit cover
Materials
- 5 balls Katia Merino-Lino: 1 x Mustard (508), 2 x Turquoise (515), 2 x Cream (500)
- Size 7 (U.S.)/(4.5mm) knitting needles
- Wool sewing needle
- Scissors
- One cushion filler: 15 ¾” (40cm) x 15 ¾” (40cm) without cover
Measurements: 16 ½” x 16 ½” (42cm x 42cm)
Gauge: In stockinette st: 4” x 4” = 19 sts x 28 rows
Stitches
 Instructions

Using mustard (508), cast on 65 sts.
Work 6 rows in knit st (= garter st).
To knit the striped cover. Change to turquoise (515) and work as follows (= stockinette st):
R1: knit row
R2: purl row
R3: knit row
Change to cream (500) and work the following rows:
R4: purl row
R5: knit row
R6: purl row
Repeat these 6 rows a total of 17 times = until work measures 15” (38cm).
Change to mustard (508) and work 7 rows in knit st (= garter st). On the 7th row loosely bind (cast off) all the sts.
Knit side edgings
Pick up 77 sts along one side of the work and knit 7 rows in knit stitch (= garter stitch) using mustard (508). On the 7th row loosely bind (cast off) all the sts. Repeat on the other side.

Make another square the same for the other side of the cushion.

Finish by sewing the two squares together and inserting the cushion filling inside the cover when only one side remains left open for sewing.

The Striped 70´s Show crochet cover
Abbreviations
DC: double crochet
SC: single crochet
CH ST: chain stitch
SS: slip stitch
* – *: Repeat the stitches between the asterisks
[ ]: Repeat everything included in square brackets
Materials
- 6 balls Katia Merino-Lino: 2 x Dark Grey (col. 505), 2 x Turquoise (col. 515), 2 x Cream (col. 500)
- Size G6 (U.S.)/(4 mm) crochet hook
- Wool sewing needle
- Scissors
- One cushion filler: 15 ¾” (40cm) x 15 ¾” (40cm) without the cover
Measurements: 23 5/8” x 23 5/8” (60cm x 60cm)

Instructions
Start – R1: using cream (500), work in a magic ring: 3 CH ST (=1 DC), 2 DC, *2 CH ST, 3 DC* repeat 3 times, 2 CH ST. Close the row with a SS in the 3rd CH ST from the start of the row. (12 DC, = 3 DC at each side and 8 CH ST)
R2: 3 CH ST (=1 DC), *1 DC in each DC on the row below. And in the space between 2 CH ST, work [2 DC, 2 CH ST, 2 DC]* repeat 4 times. Close the row with a SS in the 3rd CH ST from the start of the row. (28 DC: 7 DC at each side of the square and 8 CH ST)
R3 – R23: repeat R2, increasing at the corners as follows: 2 DC, 2 CH ST, 2 DC, as on R2.

Colour changes
And total number of DC on each row:
R3: turquoise (515). Total: 44DC (11DC on each side of the square) and 8CH ST.
R4: cream (500). Total: 60DC (15DC on each side) and 8CH ST.
R5: 76DC (19DC on each side of the square) and 8 CH ST.
R6: turquoise (515). Total: 92DC (23DC on each side) and 8CH ST.
R7: 108DC (27DC on each side) and 8CH ST.
R8: 124DC (31DC on each side of the square) and 8CH ST.
R9: cream (500). Total: 140DC (35DC on each side) and 8CH ST.
R10: 156DC (39DC on each side of the square) and 8CH ST.
R11: turquoise (515). Total: 172DC (43DC on each side) and 8CH ST.
R12: dark grey (505). Total: 188DC (47DC on each side) and 8 CH ST.
R13: cream (500). Total: 204DC (51DC on each side) and 8CH ST.
R14: 220DC (55DC on each side of the square) and 8CH ST.
R15: turquoise (515). Total: 236DC (59DC on each side) and 8CH ST.
R16: 252DC (63DC on each side) and 8CH ST.
R17: dark grey (505). Total: 268DC (67DC on each side) and 8CH ST.
R18: 284DC (71DC on each side) and 8CH ST.
R19: turquoise (515). Total: 300DC (75DC on each side) and 8CH ST.
R20: cream (500). Total: 316DC (79DC on each side) and 8CH ST.
R21: 332DC (83DC on each side of the square) and 8CH ST.
R22: dark grey (505). Total: 348DC (87DC on each side) and 8CH ST.
R23: 364DC (91DC on each side) and 8 CH ST.

Finishing
First, place the diamond shaped crochet square on top of the cushion filling. Then wrap the cover around the cushion filling, turn over and join the points in the centre (they create an ´X´). Work in SC (= from corner to corner of the cushion), passing the crochet hook through the two edges which you want to join. Tip: use the same colour as the last row of the square.