How to make a vintage granny square vest with fringes
September 15, 2023
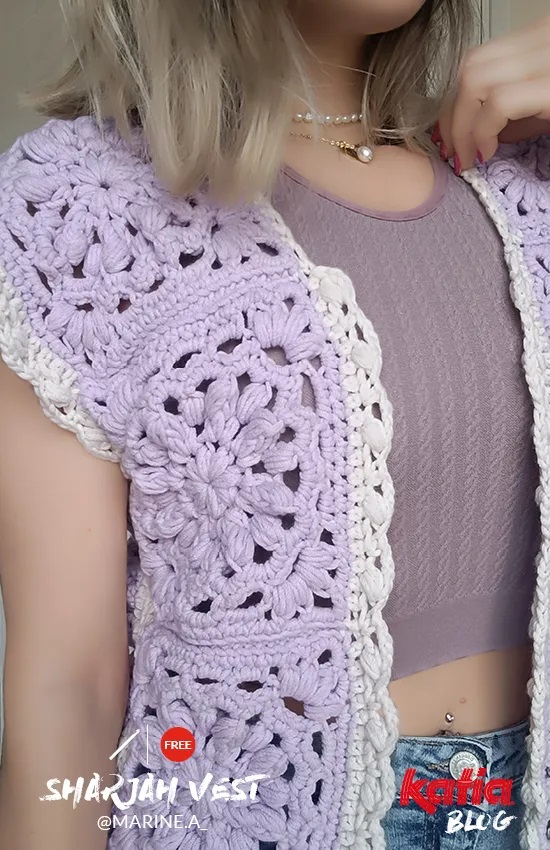
Learn how to stitch the popular granny square to make an eye-catching crochet vest. Join renowned designer, Marine, and discover her easy-to-follow creative process
09/15/2023
Interested in crafting a stylish crochet vest? The Sharjah design by @marineacreations could be your new go-to! This pattern showcases large granny squares adorned with intricate floral designs, offering a Bohemian flair perfect for summer activities and concert outfits. Discover the vibrant WOW! Summer Vibes palette for a seamless and striking appearance, or mix and match shades for a contemporary twist. For a perfect touch of flair, learn to make fringe on your designs with the Sharjah vest– a sure-fire outfit success!

The Artistry of the Sharjah Design by @marine.a_
The creative genius behind @marine.a_ is none other than Marine. Having learned crafts like knitting, crochet, and innovative jewellery-making from her grandmothers and mother, she's woven these skills into distinctive creations. Crocheting holds a special place in her heart, becoming what she calls "the central textile craft in my journey." Through her engaging crochet tutorials and patterns, Marine guides you through constructing trendy and Bohemian pieces like Sharjah floral granny square with WOW! Summer Vibes. Once you've mastered the crochet vest using our guide, delve deeper into her world by exploring her profiles on platforms like Instagram and TikTok. There, an array of crochet inspirations awaits!

How to make a crochet vest
Just get the materials ready and enjoy a full pattern with:
-
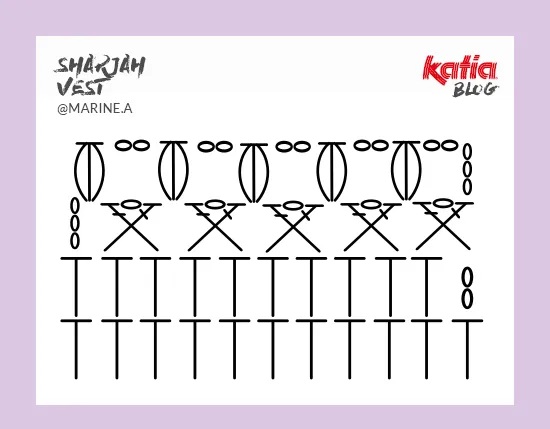
charts to make the floral granny square and the vest hem and armhole finishes
-
links to Katia Academy videos to see how to work some stitches used
Size
Woman: S/M
Materials
-
WOW! Summer Vibes: 4 balls of light lilac (color 88) and 1 ball of ecru (color 85)
-
5-mm crochet hook
-
Tapestry needle
-
Scissors
Stitches and techniques
Videos: click on the name of each stitch or technique to see how to do it.
-
Chain – ch
-
Chain space – ch-sp
-
Crossed double crochet – cdc: skip 1 st, dc in next st, ch1 and dc1 into skipped st.
-
Double crochet – dc
-
Front post double crochet X together – FP dcX tog: *yarn over, insert hook into 2 sts from prev r from front to back, yarn over and pull through, yarn over and pull through 2 loops on hook*, rep ** once more, yarn over and pull through all loops on hook.
-
Half double crochet – hdc
-
Magic ring
-
Previous – prev
-
Puff stitch – ps: *yarn over, insert hook into st from prev r, yarn over and pull through st*, rep ** twice more, yarn over and pull through all loops on hook.
-
Repeat – rep
-
Row(s) and round(s) – R(s)
-
Single crochet – sc
-
Skip – sk
-
Slip stitch – sl st
-
Stitch(es) – st(s)
-
Sc2tog – decrease
Gauge: Using the 5-mm crochet hook, crochet a granny square following chart
7 rs = 15 x 15 cm
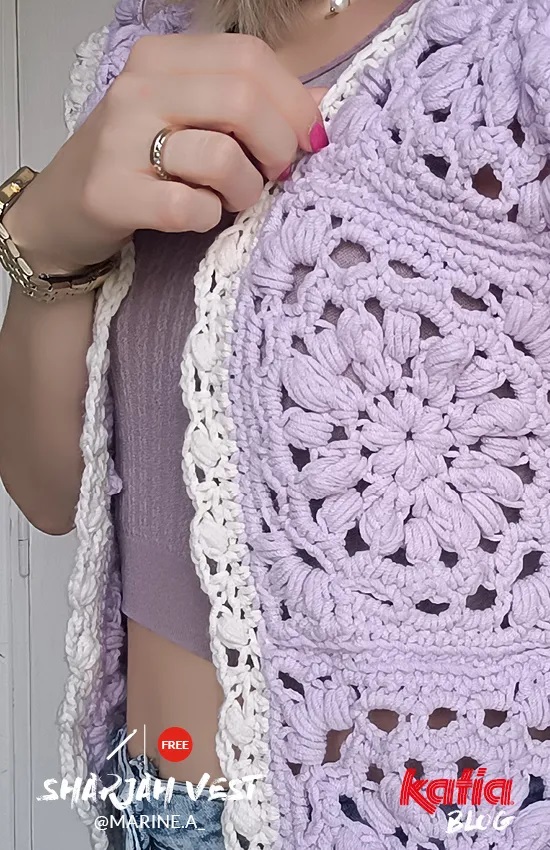
Flower granny square
R1: into a magic ring, ch3 up, ps with 2 rep, *ch1, ps with 3 rep*, rep ** 6 times more, ch1, sl st1 into the third ch up to close the r. Sl st1 to get to next ch-sp.
R2: ch3 up, dc2 into ch-sp. *Ch1, dc3 into ch-sp*, rep 6 times more. Sl st1 to close r. Sl st3 to get to next ch-sp.
R3: ch3 up, ps with 2 rep, *ch2, FP dc3tog, ch3, ps with 3 rep*, rep ** 6 times more, ch2, FP dc3tog, ch3, sl st1 to close r. Sl st1 to get to next ch-sp.
R4: *sc2, ch1, sc2* into each ch-sp to end of r. Sl st1 to close r. Sl st2 to get to next ch-sp.
R5: *sc1 into ch-sp, ch3*, rep ** to end of r. Sl st1 to close r. Sl st1 to get to next ch-sp.
R6: *sc2 into ch-sp, sc1 into sc, sc3 into ch-sp, sc1 into sc, sc2 into ch-sp, ch1. Into next ch-sp (corner), ps1, ch2, ps1, ch3, ps1, ch2, ps1, ch1, skip next st*, rep ** 3 times more. Sl st1 to close r.
R7: sc1 into each st from prev r. Sl st1 to close r.
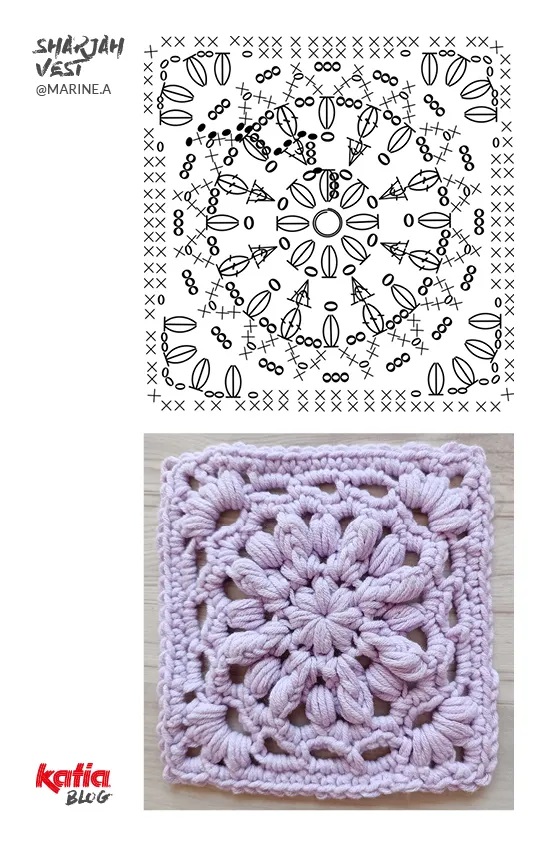
Make 15 identical granny squares.
Cut and weave in the ends.
Block the granny squares so that they’re all the same size.

Joining the granny squares
Join the granny squares with your favorite technique of choice: using your hook and working a r of sl st or seaming them with a tapestry needle.
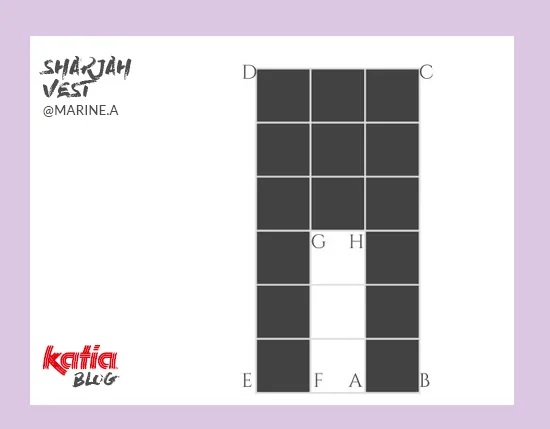
Once you’ve joined all the granny squares, work a r of hdc around the entire piece. On corners A, B, C, D, E and F, ch2 to add shape. On corners G and F which correspond to the neck, work a decrease by sc2 together. Work a sc2 together decrease at each join between 2 granny squares.
Then, sew or sl st32 along the sides of the vest to join corners B and C, E and D. Leave an opening for the armholes for your arms to go through.
Hem and fringe
For the armholes and the front of the vest: *ch3 up, *ps1 in next st, ch1, sk2, sc1 into next st*, rep ** to end of r.
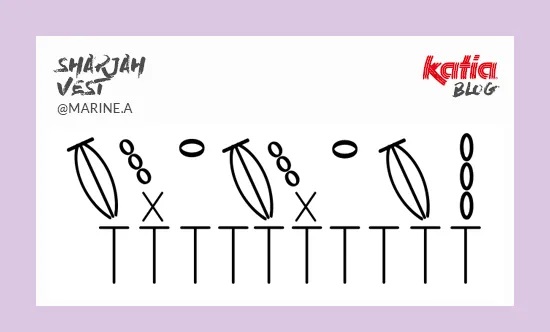
For the hem:
-
R1: ch2, hdc1 into each st to end of r. Turn.
-
R2: rep R1.
-
R3: ch3, sk1, dc1 into next st, ch1, dc1 into skipped st. (Crossed dc). Turn.
-
R4: ch3 up,*ch2, ps1*, rep ** to end of r.
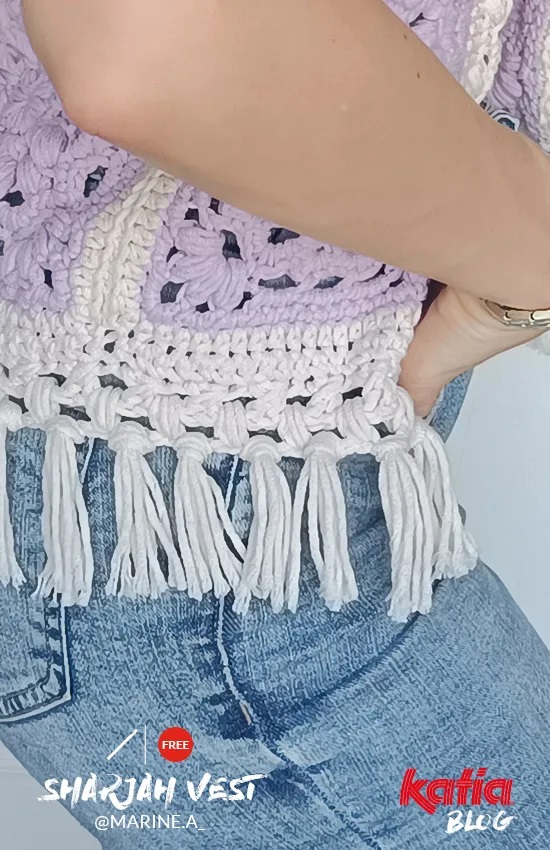
You can add fringe to the ch2-sps of the last r at the waist.
Any questions? If you have any comments, questions, or problems with the pattern, write to @marine.a_. Marine will be happy to help you!
Keep creating with WOW! Summer Vibes Yarn.
Now that you’ve created a striking crochet vest with fringe, you can complete the look with 7 eye-catching crochet designs.
Create everything from bucket hat to Palazzo trousers, and much, much more!


