Proyekto Amigurumi | Bear and bunny with a special message
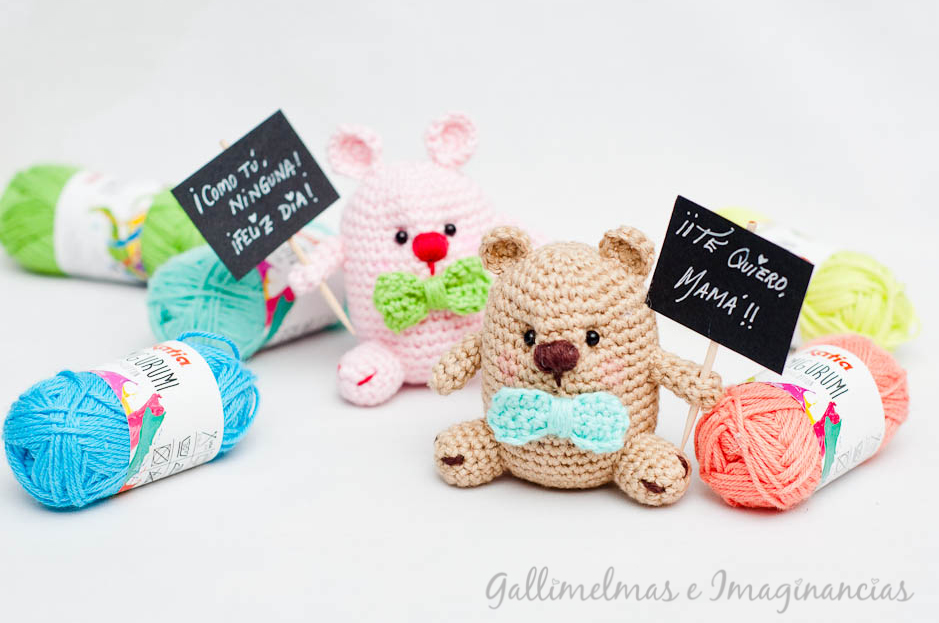
For fans of Amigurumi 100% Cotton, and for initiates of this Japanese art, Mel from Gallimelmas is sharing a basic pattern to make amigurumi bears and bunnies. Learn to give shape to a simple crochet base, add some bear or rabbit ears, include some extra details and as a result you´ll have what Gallimelmas call “a 3 in 1 amigurumi: quick, easy and cute”. A handmade gift that you can also use to convey a special message. Make a small placard and write a phrase on it congratulating a loved one. Take a look at the Gallimelmas blog and discover many creations using our threads and yarns.
WARNING: Seeing Mel´s amigurumis can provoke a strong desire to grab a crochet hook and learn. ;P

Bear and bunny with a special message by www.gallimelmas.com
Materials
Katia Amigurumi 100% Cotton · Crochet hook D3 (U.S.)/(3 mm) · Plastic eyes · Scissors · Tapestry sewing needle · Filling · Cardboard · Gel pen · Cocktail stick
Abbreviations
X= Single crochet
l= Slip stitch
m= Chain stitch
V = Increase
Ʌ= Decrease
Head-body
| Rows | Stitches to be worked | Total no. stitches |
| Start | Magic ring with 6 X | 6 |
| 1 | V in each stitch | 12 |
| 2 | (X + V)* 6 times | 18 |
| 3 | (2 X + V)* 6 times | 24 |
| 4 | (3 X + V)* 6 times | 30 |
| 5 | (4 X + V)* 6 times | 36 |
| 6 – 18 | X in each stitch | 36 |
| 19 | (4 X + Ʌ)* 6 times | 30 |
| 20 | (3 X + Ʌ)* 6 times | 24 |
| 21 | (2 X + Ʌ)* 6 times
Fill |
18 |
| 22 | (X + Ʌ)* 6 times | 12 |
| 23 | (Ʌ)* 6 times | 6 |
Close.
Embroider the nose and sew an eye onto each side of the head.
Arms x 2
| Rows | Stitches to be worked | Total no. stitches |
| Start | Magic ring with 6 X | 6 |
| 1-4 | X in each stitch
l to close |
6 |
Cut yarn leaving a longish length to sew with later. Fill.
Sew 1 arm to each side of body.
Paws x2
| Rows | Stitches to be worked | Total no. stitches |
| Start | Magic ring with 6 X | 6 |
| 1 | V in each stitch | 12 |
| 2-5 | X in each stitch
l to close |
12 |
Cut yarn leaving a longish length to sew with later. Fill.
Sew 1 paw to each side of the body as if in a sitting position.
Tail
| Rows | Stitches to be worked | Total no. stitches |
| Start | Magic ring with 6 X | 6 |
| 1 | X in each stitch
l to close |
6 |
Cut yarn leaving a longish length to sew with later.
Sew onto back of body.
Bear´s ears x 2
| Rows | Stitches to be worked | Total no. stitches |
| Start | Magic ring with 6 X | 6 |
| 1 | (X + V)* 3 times
l to close |
9 |
Cut yarn leaving a longish length to sew with later.
Sew ears onto head.
Rabbit´s ears x 2
| Rows | Stitches to be worked | Total no. stitches |
| Start | Magic ring with 6 X | 6 |
| 1 | 3 V + 3 X | 9 |
| 2-5 | 3 X + 3 V + 3 X
l to close |
12 |
Cut yarn leaving a longish length to sew with later.
Fold the ears at the bottom and sew 1 to each side of the head.
Bow
| Rows | Stitches to be worked | Total no. stitches |
| Start | 9 m | 9 |
| 1-3 | 8 X + m
Turn work |
9 |
Cut yarn leaving a longish length to sew with later.
Wrap the yarn around the centre of the rectangle a few times to make the bow. Sew below the nose/snout.
Placard: Cut a rectangle of card and write our message on it. Stick it onto the cocktail stick and it´s ready!
